20 10 2020

Bow Tie Maid Dress

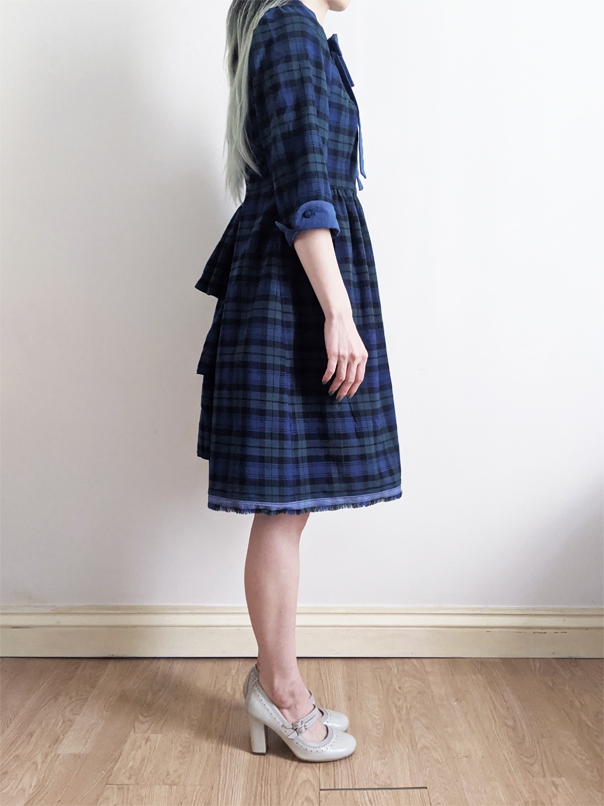
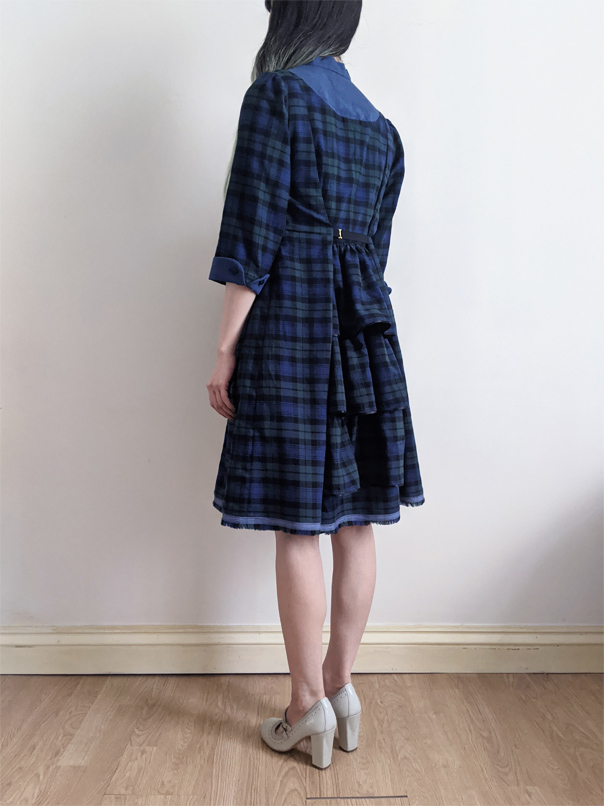
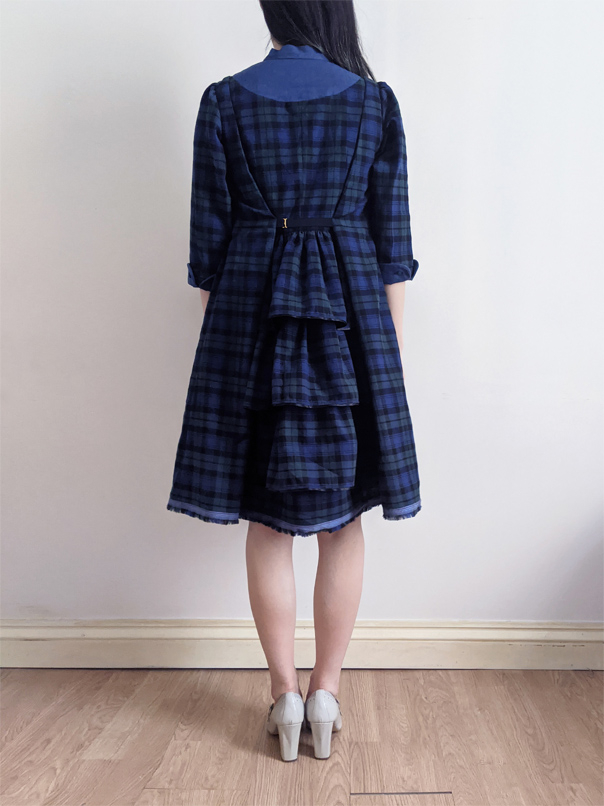
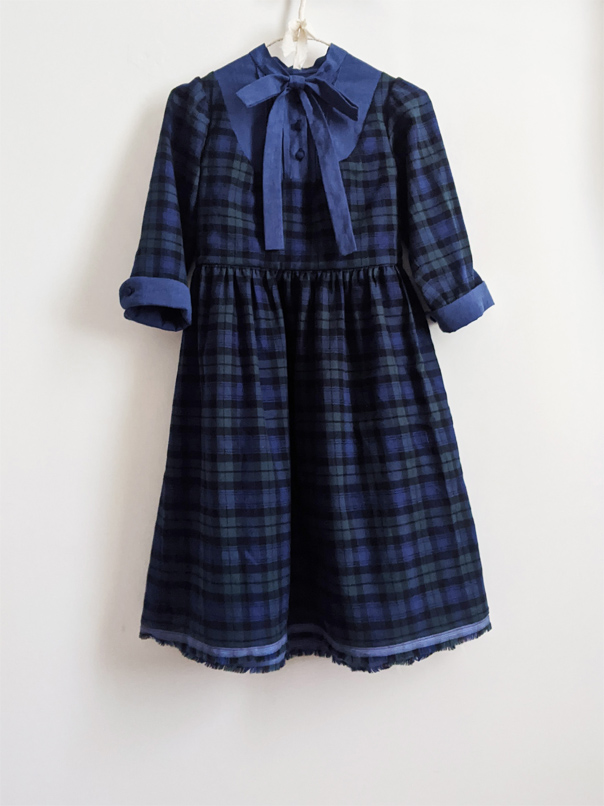
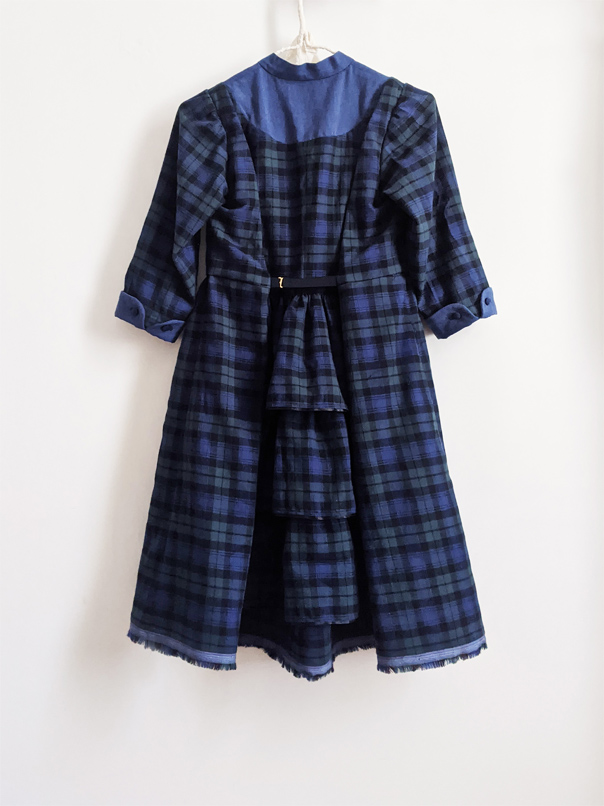
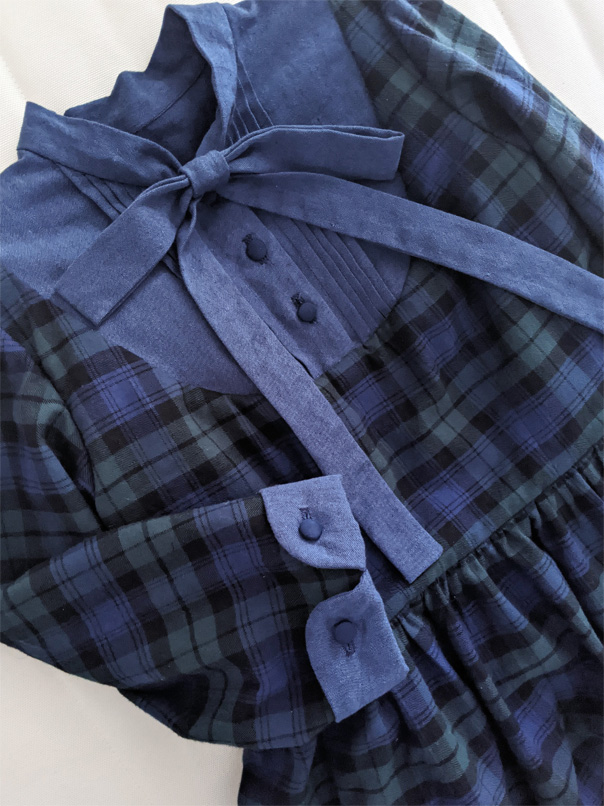
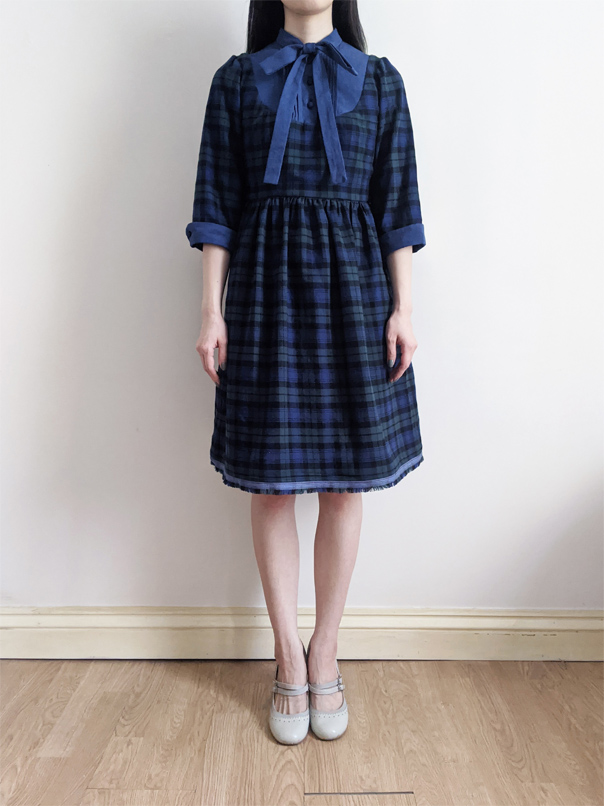
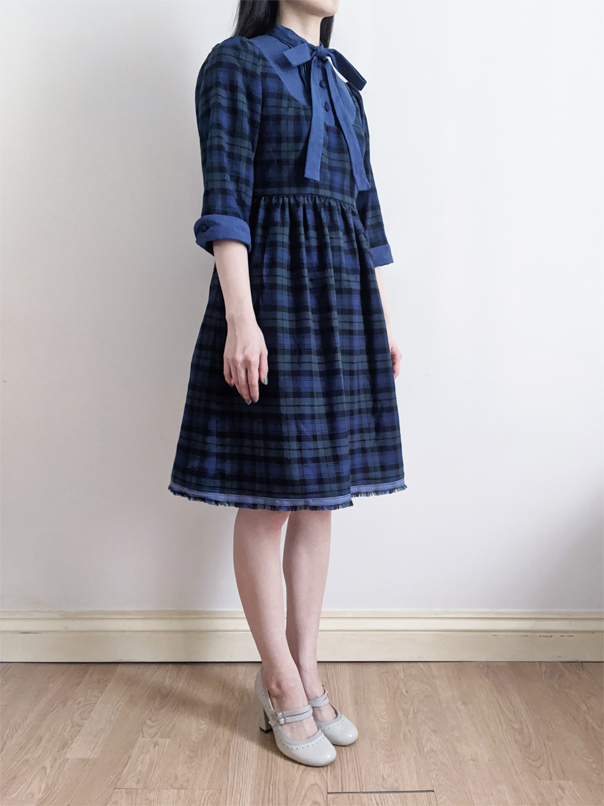
This is the final version of the commissioned maid dress made with black watch tartan fabric. It is basically the same as the prototype but it has a very different feel to it because of the fabric/colour combination. The main fabric is a soft woven tartan fabric in cotton and the contrast fabric used for the bib section and cuffs is a blue chambray cotton.

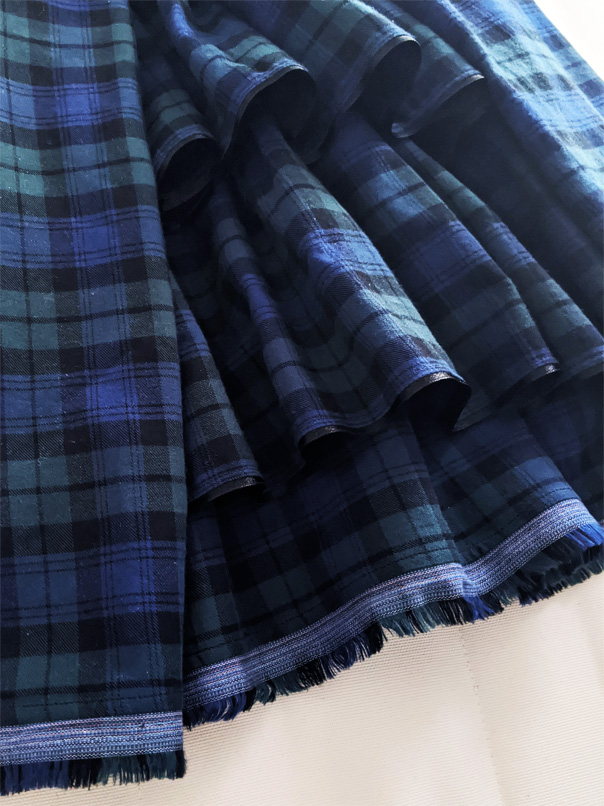
Black satin ribbons are used on the three tiered ruffles on the back skirt as trimmings. And, I would like to point out that the selvedge of the tartan fabric has been used for the hem. I noticed that the selvedge looked rather nice when I was cutting the fabric and decided to used it. Naturally, it matches the dress very well.

The bow tie is actually different from the prototype although it is not obvious. Unlike the prototype, which had loose ribbons to tie into a bow, this one has a pre-made bow with an elastic loop at the back to put the ends of the loose ribbons through it. The customer said she is fond of bow tie necklines but finds it difficult to tie a good-looking bow by herself so this was my solution.

The maid dress takes a lot of time to make due to the complicated construction and the number of pieces to sew together. It took even more time for this one as using patterned fabric means I had to make the patterns align and match up perfectly. However, the maid dress is certainly cute and beautiful in my opinion. I hope I will get to create different versions in the future too.
Share
24 09 2020

Bow Tie Maid Dress Prototype

This is a prototype I made for a commissioned dress based on the maid dress I made before. It has a knee length skirt instead of a mini skirt and a bow tie instead of a collar. Details include pin tucks at the bust, rolled up contrast cuffs with fabric covered buttons, three tiered ruffles for the back skirt, and cotton ribbon trimmings.

It has a fitted bodice but it doesn’t have a zipper in the back so how do we wear this? My maid dress has a large pleat on both sides, starting from the shoulders. They open up when the strap at the back waist is unhooked and the dress becomes loose from the pit down. Personally, I don’t like the look of zippers on dresses because they look harsh and/or too bling. There are also fears of breaking and fabric getting caught so I avoid them unless it’s for activewear.

I combined 6 different fabrics in white, beige, and pink tones from leftover fabrics to use them up. They were not the colours or the colour/fabric combinations I would go for if I was fabric shopping but I think the result is successful. It makes me think of mocha and macarons, perfect for the tea and cake context.

Share
14 06 2020

Embroidered Face Masks

Hello, I am still alive. I hope you are doing okay too. I have mainly been busy doing translation work and games testing, and also made my first desktop PC, but I have done some crafting too.

I have designed a set of face masks for my friend who wanted a set of two, each of them embroidered with my frequently used sentences, ‘Are you okay?’ and ‘I will be fine.’ She wanted them to be large, in pleated style(not in shaped style), pale coloured, and didn’t want the elastics to be too tight. I had a look through my fabrics and chose light weight lemon colour cotton and pastel orange cotton because I thought those colours are not associated with the medical envoriment. I chose fluorescent pink for the embroidered text so it stands out and completes the citrus/candy colour combination.

I’ve done some research on the internet and tried out with pieces of paper and came out with the sizing of 21cm acrross, 16cm top to bottom, which is probably one of the largest you’ll find. I noticed some masks have a pocket to insert a filter so I thought I’d add that too. I used two layers of the front side fabric so the inside fabric doesn’t show through and used three layers of double layer gauze for the inside so the back side of the embroidery won’t show from either side. So, it’s eight layers in total like this:

embroidered text on top

2 layers of front side fabric

1 layer of double layer gauze

back side of embroidery (It must not be seen. Hide this!)

1 layer of double layer gauze

pocket opening

1 layer of double layer gauze

The result is soft and fluffy… The top and bottom seams are turned to the back side, stitched down, and pressed, so the gauze fabric won’t peak from the front side. The sides are bound with separate fabric (pastel orange) to create a loop for the elastics with no visible stitches on the front side of the masks. The design and those processes use more material and make the whole production time much longer, but it’s worth it. And I know that some people will notice the difference.

I’ve also made a few in navy for some people who prefer, or I thought might prefer, darker colour. I still haven’t made one for myself but maybe I will when I run out of my disposable ones that I had already as a typical Japanese. Stay safe and take care!

Share
19 11 2019

Officer Jenny Costume

Hello, it’s a bit late but I would like to share some photos of my Halloween outfit this year. This time, I’ve actually done a cosplay rather than designing my own outfit with a general theme. To celebrate the launch of the new Pokemon game, Sword and Shield, I’ve chosen Officer Jenny from the anime series. Her outfit seemed fun to re-create and challenging. It was a lot of effort to prepare all the pieces needed. I’ve made the hat, top, collar, skirt, bag, and gloves by referencing images from the anime and other people’s costume.

It took a few attempts to get the pattern right for the fitted top and skirt. I struggled with the cuffs the most because I was fussy with the way they hung in relation to the sleeves but I’m happy with the final result. The gloves took quite a few attempts too since it was my first time making fabric gloves but the sewing itself was not so difficult compared to getting the fit right.

The main blue fabric and the black fabric used for the bag are cotton drill. The red fabric and the black fabric used for the brim of the hat are cotton sateen. The gloves are made of white jersey fabric. I’ve bought the star shaped badge on the hat, custom made name plate on the collar, name tag used for the bag strap, and buttons used for the hat and pocket flaps all in gold colour. I searched for a web belt with a gold buckle as well. The covered buttons at the back of the top and the bag were made by me using the same fabrics as the outfit.

It was great fun queueing up for the limited time pop-up store, Pokemon Centre London, wearing this although it wasn’t the most comfortable outfit. I got noticed by other Pokemon fans and received many compliments while I queued for 8 hours and shopped in an ecstatic mood. My sidekick was wearing the Team Rocket James outfit I also made as well.

Share
30 05 2019

Tailcoat prototype

Hello, I am still alive. I’ve finally made a calico prototype for the tailcoat my friend has commissioned me a few years ago. The reason it’s taken so long is mainly because I’ve never made a jacket before and it was going to be a challenge for me. Since this particular friend always has something for me to make, this one got put off until it became the priority.

The order was to design and create a feminine tailcoat. The body and arms are relatively fitted and the hem draws a smooth curve from the cut off front to the knee length tail. It has a shawl collar and is double breasted. The final design might be altered but here it is to start with.

I used scrap calico where I could as long as it was symmetrical so there’s a subtle patchwork effect which I quite like. You can see it better in the close up photo of the lining. The four gold buttons are spare regimental buttons I had, but don’t know why I have them. The skirt is just a sample circular skirt I styled the jacket with and not part of the garment.

Share